Unboxing Rikomagic MK802IV TV Stick


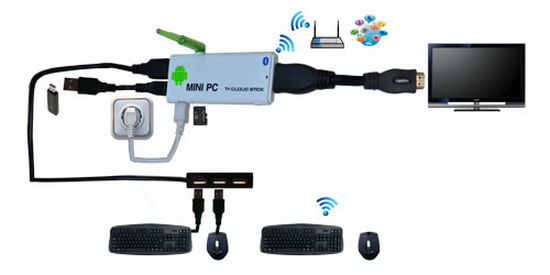
Thanks to Rikomagic company, I just received yesterday the new Rikomagic MK802IV Mini PC. As you all know, the MK802IV mini PC runs Android Jelly Bean 4.2 and it is designed to be plugged directly into the HDMI port on a TV, converting the normal HDMI TV into a Smart TV, and makes your living room become a widely popular home entertainment center. 

You can see the new RKM logo inscriptioned on the case of this new beautiful and powerfull device. Also, the case for MK802IV looks the same with the MK802IIIS case. This time Rikomagic chose to add in the box the wall adapter power supply, which is a very good decision, because the previous models got into a lot of trouble because the owners didn't use the 5V 2A power adapters as recommended by the manufacturer. It is known that current of TV and PC USB is about 0,5A (5V) and external power supply to the TV box is needed to ensure the normal functionality of the device. Lower power affects the WiFi reception, video HD decoding, and more...
You can download Hi-Res pictures from here.


Featuring the Rockchip 3188 chipset solution the MK802IV is capable of truly blistering performance for games and demanding apps, it also has the smoothest GUI you will find on any TV device, fully utilising the capabilities of Android 4.2

The MK802IV comes with 2G DDR3 RAM and 8/16 GB Flash, Wifi and Bluetooth.

Basic Specifications:
*CPU: Rockchip RK3188 quad core Cortex A9
*GPU: Mali-400MP4
*System Memory – 2GB DDR3
*OS: Android 4.2 OS
*Storage – 8/16 GB internal flash + micro SD slot (up to 32GB)
*Connectivity – Wi-Fi 802.11 b/g/n
*Bluetooth: Built-in
*Video Codecs – VP8, AVS, MJPEG, RV8/9/10, H.263, H.264, VC-1, MPEG-2, MPEG-4, DIVX
*Video Container Formats – AVI, RM, RMVB, PMP, FLV, MP4, M4V, VOB, WMV, 3GP, MKV, ASF, 3G2M4V.
*Audio Codecs/Formats – MP1/2/3, WMA, OGG, AAC, M4A, FLAC, APE, AMR, RA, WAV.
*USB – 1x USB Host 2.0, 1x micro USB for power, 1x USB OTG


Stay tuned, more to come these days: hands on, reviews & full HD video tutorials!


via touchscreen-apps.blogspot.ro

Video tutorial: How to install Android Jelly Bean 4.2.2 on Pipo S1 tablet

Download links and instructions you'll find here.


 Always keep in mind that this is not a review, just a first sight of this firmware. You have to test it more for another details, to see if it satisfies your needs.

Rikomagic MK802IV Quad Core TV Stick Android 4.2 Firmware Release


Today Rikomagic released the newest 4.2 Android Jelly Bean firmware for its MK802IV Quad Core TV Stick - IV update FW0523 version. It can be downloaded from here, here and here. To upgrade the MK802IV from 4.1 to 4.2 you have to use Rockchip Batch Tool v1.7

It can support XBMC, with soft turn off. It means that when you turn off your TV, and turn it on, the mini pc will also boot automatically. It also support remote control and the app will be upload to google play in near future.

I'll get my MK802IV Quad Core TV Stick these days, so stick nearby to see the full HD videos with unboxing, hands on and much more.


Download Rockchip Batch Tool v1.7 & Rockusb Drivers v3.5


You can download Rockchip Batch Tool v1.7 & Rockusb Drivers v3.5 from here, here or here.


Don’t miss any of our future video tutorials, follow us on Youtube. Like us on Facebook. Add us in your circles on Google+. Watch our photo albums on Flickr. Subscribe now to our newsletter.

Android Jelly Bean 4.2.2 Test Build v3.2 firmware installed on Pipo S1 tablet


Thanks to Oma, now we can enjoy Android Jelly Bean 4.2.2 Test Build v3.2 on our Pipo S1 tablet. I'll be back with the instructions.

- System ext4 
- CWM 6.0.1.5 recovery
- Internal Storage 2,5 GB
- external SD mounted as NAND (up to 64 GB)
- TabletUI & Multiuser

- Ethernet & Hotspot Support
- Init.d support
- USB-Hub enabled
- Gamepad (PS2, XBox, ...)
- Kernel modules (cifs, tun, lan, serial)
- Device spoofed as Nexus 7
- Gameloft/Asphalt 7 compatible
- latest hosts, su, su-binary, busybox
- MX Video-Player, Play Music & Volume+
- Reboot Menue, Kernel Tuner, Pimp My Rom, Hide Task-Bar
- Dateimanager HD (Root)
- Nova Launcher


 Always keep in mind that this is not a review, just a first sight of this firmware. You have to test it more for another details, to see if it satisfies your needs.

Rikomagic MK802 IV quad core Mini PC


Highligths

* Rockchip 3188 Quad core, 28nm, 1.8GHz Cortex-A9 
* 2D/3D GPU,GPU Mali-400 MP4 @ 533MHz 
* GPU offers 3D graphic with OpenGL ES2.0 and OpenVG 1.1 
* Android 4.1,(will update to Android4.2 with Miracast) 
* Use 2GB DDR3 8GB/16GB ROM high capacity memory 
* With WIFI 802.1b/g/n Wireless to get rid of the wire bond 
* Build in Bluetooth 
* Support the latest HTML5,Flash11,etc. network standard. 
* ESD circuit design make sure the stable feature, support soft turn off 
* Strong Power Manage Unit (PMU) 
* There are more than 600,000 Google Play apps and games for a great experience 
* Extension ports support 2.4GHz wireless mouse, wireless keyboard with touchpad, etc, while a micro-SD slot lets you add more storage memory up to 32GB 


Specification

CPU: Rockchip 3188 Quad core, 28nm
GPU: 2D/3D GPU,GPU Mali-400 MP4 @ 533MHz,GPU offers 3D graphic with OpenGL ES2.0 and OpenVG 1.1
OS: Android4.1,(will update to Android4.2 with Miracast).
Main Frequency: Cortex-A9,Up to 1.8GHZ
RAM: 2G DDR3
Memory: 8GB/16GB for option
Expand Micro SD: T-Flash(Maximum support 32GB)
Browser: Browse webpages
Video Format: WMV/ASF/MP4/3GP/3G2M4V/AVI/MJPEG/RV10/DivX/VC-1/MPEG-2/MPEG-4/H.263/H.264/1280*720P HD 30 fps, 1080P/720*480 D1 30fps
Audio Format: MP3/WMA/APE/FLAC/AAC/OGG/AC3/WAV
Music: Can be connected to the Internet, listen to music online
Picture format: Max.8000x8000 JPEG BMP GIF PNG
WiFi: 802.11 b/g/n
Bluetooth: Build in
Flash: Supports flash 11.1 or later.
Ports: HDMI (male), Micro SD slot, USB host*1,USB OTG*1, USB power port; LED(Blue)
Accessories: HDMI cable, USB power adapter, USB connector adapter, manual


Manufacturer website - www.rikomagic.com

Rikomagic MK602 Dual Core Magic Box


Highligths

* Rockchips RK3066 dual core,1.6GHz Cortex A9 
* GPU: GPU Mali-400, offers 3D graphic with OpenGL ES2.0 and OpenVG 1.1 
* Android 4.1 OS 
* 1G DDR3,8G ROM high capacity memory 
* With WIFI 802.1b/g/n Wireless to get rid of the wire bond 
* Support RJ45, 10/100M LAN network 
* Build in Bluetooth 
* Support the latest HTML5 & Flash11
* Support external 3G USB Dongle 
* Build in camera and microphone, support Skype video all, MSN, Facebook, Twitter, QQ 
* There are more than 600,000 Google Play apps and games for a great experience 
* Extension ports support 2.4GHz wireless mouse, wireless keyboard with touchpad, etc, while a micro-SD slot lets you add more storage memory up to 32GB


Specification 

CPU: Rockchip 3066 Dual core
GPU: 2D/3D GPU,Quad Core Mali 400 (Open GL ES2.0/1.1, Open VG1.1, Flash 11.1)
OS: Android 4.2,Support Miracast
Main Frequency: Cortex-A9,Up to 1.6GHZ
RAM: 1G DDR3
Memory: 8GB
Expand Micro SD: T-Flash (Maximum support 32GB)
Browser: Browse webpage
Video Format:RM/RMVB, MPEG, MKV, AVI, MP4, MOV, FLV, H.263, H.264, VC-1, DivX, Xvid, TS, RealVideo, VP6, VP8 up to 1080P support
Audio Format:    AAC-LC/HEAAC/HE-AACv2, AC3, AMR-NB, DTS, MP3, OGG, RA_COOK, WMA, WMA, LPCM/PCM/ADPCM, FLA
Music: Can be connected to the Internet, listen to music online
WiFi: 802.11 b/g/n
Bluetooth: Build in
Flash: Supports flash 11.1 or later.
Ports: HDMI, AV output, Micro SD slot, USB host*2;RJ45, Camera, MIC,DC IN
Accessories: HDMI cable, AV cable, power adapter, manual 


Manufacturer website - www.rikomagic.com 

Egreat releases its reliable quad-core Android TV Stick H9


As a field-leading HD media player company, Egreat is pleased to release its first quad-core TV stick H9. Delivery from your local distributors / online retailers will be available very soon! 


H9 has many special features that found on a TV stick 
- Embedded the ever powerful quad-cord processor RK3188 from Rockchip Electronics, of which the peak frequency up to 1.8GHz
- 8G NAND FLASH, and a MicroSD card slot (up to 32GB), a larger space for your interesting applications
- Be pre-installed the Android 4.2 Jelly Bean, a popular and multi-function version
- Share your media directly to H9 connected with your TV
- 802.11 b/g/n wifi connection, no wire needed to your router
- Be flexible to communicate with all your Bluetooth devices


Specification
- CPU: Rockchip RK3188 Quad Core Cortex A9 with Quad Core GPU
- GPU: Mali-400MP4
-  System Memory :2GB DDR3
-  OS: Android 4.2 OS
-  Storage – 8 GB internal flash + micro SD slot (up to 32GB)
-  Connectivity – Wi-Fi 802.11 b/g/n
-  Bluetooth: Built-in
- Video Codecs – VP8, AVS, MJPEG, RV8/9/10, H.263, H.264, VC-1, MPEG-2, MPEG-4, DIVX
-  Video Container Formats – AVI, RM, RMVB, PMP, FLV, MP4, M4V, VOB, WMV, 3GP, MKV, ASF, 3G2M4V.
-  Audio Codecs/Formats – MP1/2/3, WMA, OGG, AAC, M4A, FLAC, APE, AMR, RA, WAV.
-  USB – 1x USB Host 2.0, 1x USB OTG, 1x micro USB for power.


For more info please visit

Android Jelly Bean 4.2.2 Test Build v3.1 firmware installed on Pipo S1 tablet

[Update] Here we go with the install instructions:

1. Download the firmware from here, here or here. Unzip the archive.
2. Download the SD files from here, here or here. Unzip the archive and copy the 2 files (1._Oma RK30 JB 4.2.2 Format NAND.zip & 2._Oma_JB_4.2.2_v3.2_Pipo_S1_wifi_fix.zip) to your micro SD card. Insert the SD card into your Pipo S1 tablet.
3. Put Pipo S1 tablet in firmware update mode and then run RKAndroidTool.exe; leave all the fields checked, press 'ErasaIDB' button, wait for the proccess to finish and the press 'Run' button.
4. Wait for the firmware to install (about 4 minutes), it will automatically boot into recovery. Here you have to choose to install zip from your SD card, in the this exactly order: 1._Oma RK30 JB 4.2.2 Format NAND.zip & 2._Oma_JB_4.2.2_v3.2_Pipo_S1_wifi_fix.zip. Then use the CWM line to reboot the tablet.
5. Wait for tablet to boot and enjoy this new firmware with working wifi.

All credits go to Oma


Thanks to Oma, now we can enjoy Android Jelly Bean 4.2.2 on our Pipo S1 tablet. I'll be back with the instructions.

- System ext4 
- CWM 6.0.1.5 recovery
- Internal Storage 2,5 GB
- external SD mounted as NAND (up to 64 GB)
- TabletUI & Multiuser

- Ethernet & Hotspot Support
- Init.d support
- USB-Hub enabled
- Gamepad (PS2, XBox, ...)
- Kernel modules (cifs, tun, lan, serial)
- Device spoofed as Nexus 7
- Gameloft/Asphalt 7 compatible
- latest hosts, su, su-binary, busybox
- MX Video-Player, Play Music & Volume+
- Reboot Menue, Kernel Tuner, Pimp My Rom, Hide Task-Bar
- Dateimanager HD (Root)
- Nova Launcher


 Always keep in mind that this is not a review, just a first sight of this firmware. You have to test it more for another details, to see if it satisfies your needs.

How to dump current Android firmware


Romdump is a (very) simple program that dumps the boot, recovery and system partitions to your SD card, this will allow someone who is technicaly minded to create a recovery image.
First, you need a rooted device before you can begin the process. After you have rooted it, you have download from Play Store an application called 'Android terminal emulator'.

Next, copy the 'romdump' file to your SD card and put the sdcard into your device. Copy and paste the romdump file to /data/local/ (open root browers /root access file manager and then go to data folder and then open local folder and paste the file romdump). Change the permission of the romdump file (using ES File Explorer --> Hold the file --> Properties --> and change it to 755 (rwxrw-rw).
Created a folder name 'romdump' in SD card.  Open the installed android terminal emulator app and use to following command:

After you run that you can copy the whole folder from /sdcard/romdump to your PC (using external sdcard, usb plug-in, etc)
Note: if you get a error about "cannot create /sdcard/romdump/..." that means you need remove a file/folder in your sdcard that named as romdump. You will see all the things whats going on below if you see this then you will get the ROM dumped if not then follow the steps once again.

Here is the list of the files you get after running romdump:

config.gz
system.info.gz
boot.img
recovery.img
system.tar
checksum.md5
Android ROM dumper v0.82b
(c)2011 Sebastian404
Device : xxxxxxx

Creating required files... done.
Opening mtd table... done.
Dumping kernel config... /proc/config.gz: No such file or directory
done.
Dumping boot partition... done.
Dumping recovery partition... done.
Dumping system partition... done.
Creating Checksums... done.
Cleaning up... done.
All done. 


via http://touchscreen-apps.blogspot.ro

Egreat U5 HD Media Player


Intelligent your TV,now with tens of thousands of android games & applications. Watch movies, listen online radios, play games, play Youtube videos and much more with this great home entertainment center - Egreat  U5 HD Media Player.


Features
Hi3716C chipset 1.0GHz ARM Cortex A9 with GPU
1G RAM
2G / 4G Flash
Android 4.1 Jelly Bean OS
SBS 3D movie supported
DLNA / AirPlay function
YouTube Online
BD Navigation 
Dolby,DTS Dual Decode
HDMI v1.3 Output
150 M b/g/n WIFI Support
Remote Power On/Off 
File Management
CE & RoHS Certifications


Specification
Model: u5
Chipset: Hi3716C chipset, 1.0GHz ARM Cortex A9 with GPU
Memory: 1G RAM
Storage: 2G / 4G Flash       
Video Formats: MPEG1/2/4 Elementary (M1V, M2V, M4V),MPEG1/2 PS (M2P, MPG, DAT, VOB), MPEG2 Transport Stream (TS, TP, TRP, M2T, M2TS, MTS)
AVI, ASF, WMV, Matroska (MKV), MOV (H.264), MP4, RMP4, DVD navigator(cracked DVD)DVD ISO,Original BD disk, Mini Blu Ray ISO, FLV
Video Decoders: MPEG-1, MPEG-2 MP@HL, MPEG-4.2 ASP@L5, WMV9 MP@HL, VC-1 MP@HL and AP@L3, H.264 MP@L4.0 and HP@L4.0, Microsoft MPEG-4 v3 for maximum DivX v3.11 compatibility, H.261
Audio Formats: AAC, M4A, MPEG audio (MP1, MP2, MP3, MPA), WAV, WMA, FLAC+CUE, APE+CUE, OGG
Audio Decoders: DTS, DTS-HD HR, DTS-HD MA, Dolby Digital, Dolby Digital Plus, Dolby True HD WMA, WMA Pro, MPEG-1 Layer 1, 2, 3, MPEG-4 AAC-LC, MPEG-4 HE-AAC, MPEG-4 BSAC
Audio Pass-Through: DTS, DTS-HD HR, DTS-HD MA,Dolby Digital, Dolby Digital Plus, Dolby True HD, PCM, LPCM, WMAPRO
Photo Formats: JPG, BMP, GIF, PNG, TIF/TIFF
Subtitle Formats: SRT, SUB, SSA, ASS, TBD PGS, TBD disk external subtitle
Menu Language: English, Simple Chinese,Traditional Chinese, France, Germany, Turkish, Russian, Portuguese, Serbian, Vietnamese, Greece, Bulgarian
Subtitle Language: Unicode-B, Auto, GB2312, GBK, BIG5, UTF-8, Unicode-L
File System: FAT16, FAT32, NTFS
Video Output: HDMI v1.3 1080p output, CVBS
Audio Output: Stereo L/R
Network: 10/100M Ethernet
USB: 2 x USB 2.0 Host
SATA: NO
eSATA: NO
Power: 5V DC 3.0A Power adaptor
Unit Dimension: 164*164*42mm
Unit Weight: 0.48 Kg
Remote Controller: 0.11 Kg without battery


Accesories


Manufacturer website - egreatworld.com

Pipo Smart S1s tablet


Pipo prepares to launch the Smart S1s tablet, which is an improved version of Smart S1 tablet. The big differences between the 2 models are: S1s is powered by the new OS Android Jelly Bean 4.2 (S1 has now only 4.1, but I guess soon it will updated also to 4.2), S1s has a better display - IPS panel with 1024*600 resolution (S1 has 800*480 resolution). Optional, S1s can be equipped with 2MP back camera. In rest, all the specifications are the same.


Rikomagic statement against clones


Rikomagic took an official and responsible position against the invasion of clones of their popular devices.

'We hereby declare that Shenzhen Rikomagic Tech Corp.,Ltd has only two brands Rikomagic and RKM. The other rormative rikomagic brands on the market are not ours and not produced by us. Please pay attetion to it.
Thank you!'

The two original brands logos are above.

Cube Win8 firmware installed on Pipo S1 tablet


Here is the easiest to install this firmware:
1. Download Cube Win8 archive from: link1 or link2.
2. Put your Pipo S1 in 'firmware update mode'.
3. Extract the archive and run RK30update.exe, uncheck Boot, check Kernel and select kernel_maple_#117, and after your device is found by the program, press the 'Actualizar' button and wait for 2-3 minutes to finish.
4. After first boot go directly to 'Settings'--> 'Developer Options' and check these options: USB Debugging and in 'Security'--> enable 'Unknown Sources'. 
5. Follow the instructions from the video below. Enable WiFi network and add your Google account. Connect to Play Store and install a launcher and a file eplorer (like ES Explorer) to navigate to your external micro SD card and install 'full!screen+' or 'Button Savior Root' application.

 
Enjoy this firmware release, share is love!  

 Always keep in mind that this is not a review, just a first sight of this firmware. You have to test it more for another details, to see if it satisfies your needs.

CyanogenMod 10 installed on Pipo S1 tablet

Here is the easiest to install this firmware:
1. Download BQCM10SAG archive from: link1 or link2.
2. Put your Pipo S1 in 'firmware update mode'.
3. Extract the archive and run RK30update.exe, uncheck Boot, check Kernel and select kernel_maple_#117, and after your device is found by the program, press the 'Actualizar' button and wait for 2-3 minutes to finish.
4. After first boot go directly to 'Settings'--> 'Developer Options' and check these options: USB Debugging and in 'Security'--> enable 'Unknown Sources'. 
5. Shut down the  tablet and then turn it on. Use ES Explorer to navigate to your external micro SD card and install 'full!screen+' or 'Button Savior Root' application.


Credits for this firmware go to exxpecial.
 
Enjoy this firmware release, share is love!  

 Always keep in mind that this is not a review, just a first sight of this firmware. You have to test it more for another details, to see if it satisfies your needs.

ExxpeROM2.6 bq Edison firmware installed on Pipo S1 tablet

Here is the easiest to do this firmware update:
1. Download exxpeROM2.6_BqED firmware image from: link1, link2 or link3.
2. Put your Pipo S1 in 'firmware update mode'.
3. Run Rockchip Batch Tool v1.6, select the proper image .img file from your desktop, and after your device is found by the program, press the 'Restore' button and wait for 2-3 minutes to finish.


Credits for this firmware go to exxpecial.
 
Enjoy this firmware release, share is love!  

 Always keep in mind that this is not a review, just a first sight of this firmware. You have to test it more for another details, to see if it satisfies your needs.

ExxpeROM2.5 bq Maxwell Plus firmware installed on Pipo S1 tablet

Here is the easiest to do this firmware update:
1. Download exxpeROM2.5_BqMP firmware image from: link1, link2 or link3.
2. Put your Pipo S1 in 'firmware update mode'.
3. Run Rockchip Batch Tool v1.6, select the proper image .img file from your desktop, and after your device is found by the program, press the 'Restore' button and wait for 2-3 minutes to finish.


Credits for this firmware go to exxpecial.
 
Enjoy this firmware release, share is love!  

 Always keep in mind that this is not a review, just a first sight of this firmware. You have to test it more for another details, to see if it satisfies your needs.